Informing colleagues and updating information is important today, especially when working with different spreadsheet environments. Having relied on Google Sheets and Excel repositories, it is rather logical that you may ask for help on how to convert Google Sheets to Excel due to some limitations.
Following the next several sections, you will be able to grasp how to convert Google Sheets to Excel both manually and automatically. Moreover, find out how to maintain your files and documents using a tool, Along with a few gestures.
How do you manually export Google Sheets to Excel?
Regardless, if you need to give your spreadsheet to a coworker who uses Excel or prefer working with the tools available in Excel, you have to save your files in Excel format. This part will also outline two manual methods for converting Google Sheets to Excel. First, select one Google Sheet and download it to Excel format subsequently, convert various Google Sheets.
How do you save Google Sheets as Excel One By One?
In some cases, when migrating from Google Sheets to Excel, you may find yourself in a position where you save each of the Google Sheets individually into Excel format. Below are the steps to save Google Sheets as Excel files without wasting time.
How Do I Download a Google Sheet to Excel with Formulas Via Downloading
Follow the steps below to download the Google Sheet to Excel while keeping the formulas intact:
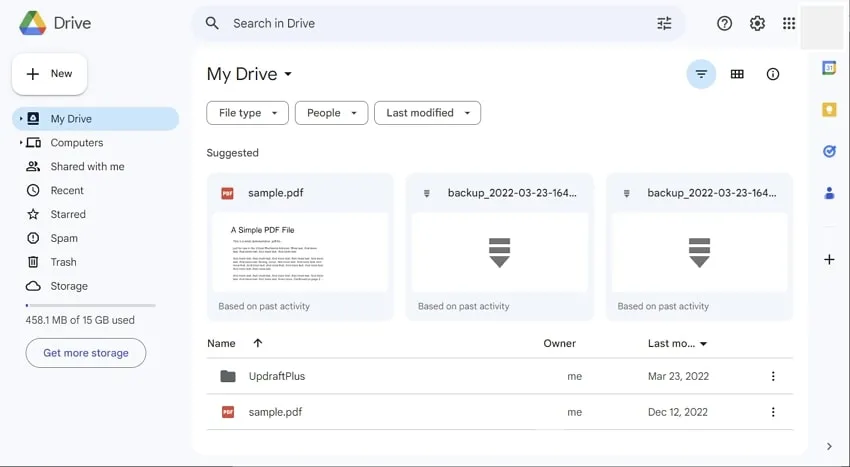
Step 1: Start by opening the Google Drive on your device. To download the Google Sheet as an Excel file, you need to open the particular Google Sheet in which you are interested and then double-click it.
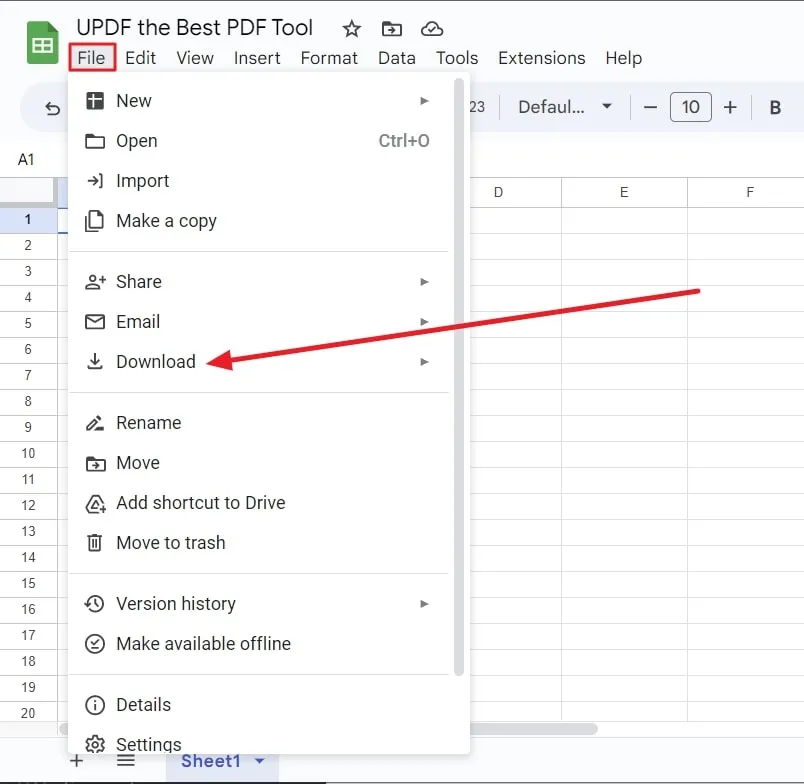
Step 2: Now wait for it to load completely, go to the upper left of the Sheet where the option that says ‘File‘ should be clicked. When the drop-down menu appears, press on the word ‘Download‘ to expand the sub-menu that will appear.
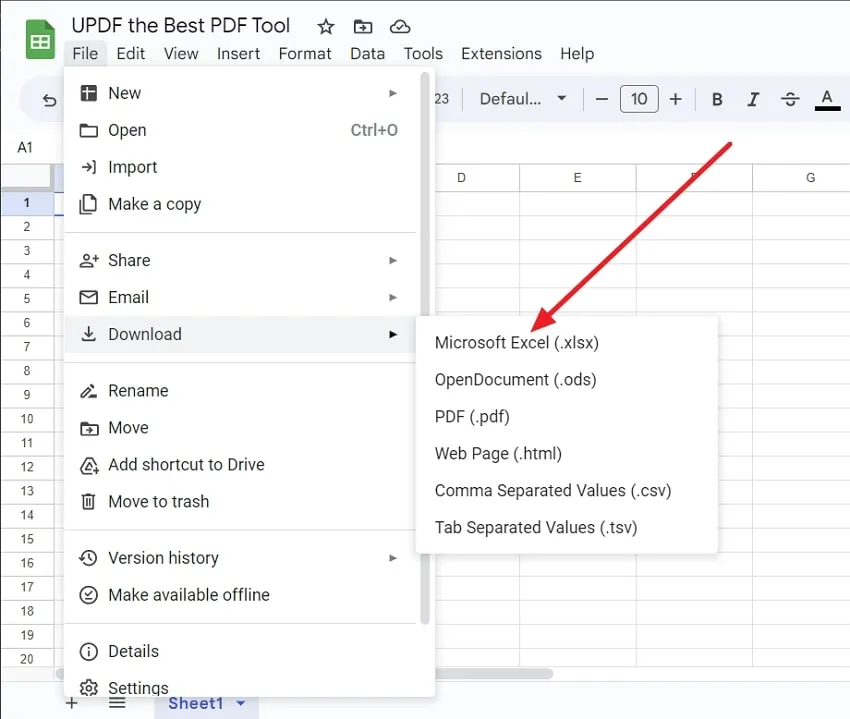
Step 3: After this, you will witness the screen highlighting the six shows to be prepared as the format of the file to be downloaded. Here, we will select and click ‘Microsoft Excel (.xlsx),’ and your file will begin downloading in Excel format. Now it is time to move over to your “Download” folder and open the file to do a bit of tweaking.
How to Convert a Google Sheet to Excel Without Formulas Via Copying and Pasting
Another easy way is to work with the Excel copy-paste option and paste the information from Google Sheets. But still, remember that it will not capture the formulas with it. To use this method, follow the straightforward instructions guided in this part:
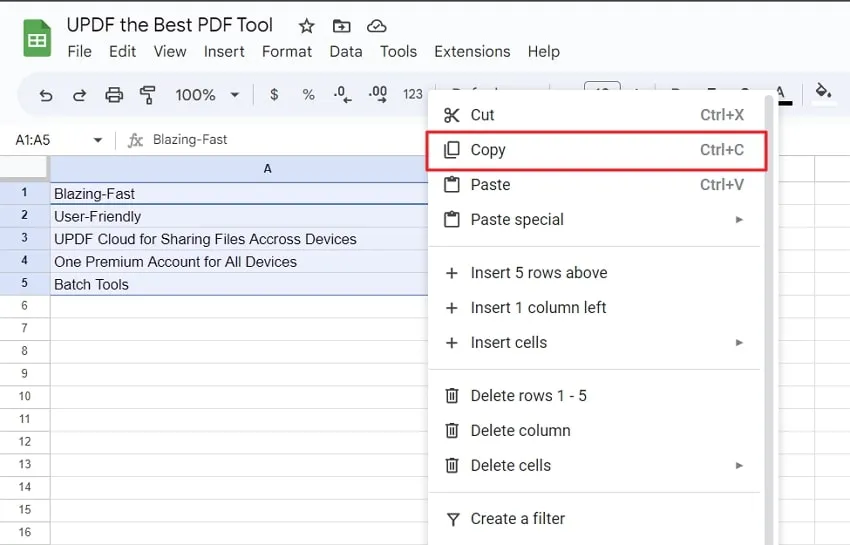
Step 1: Open Google Drive and navigate through the Google Sheet file you want to copy and paste. Following that, you can meticulously choose an array of data or related fields you want to copy. In the same way, left-click then right-click when at the data capture area, and from the options produced, select ‘copy‘ or have the data copied by pressing ‘Ctrl C‘ on the keyboards. Of course, your data is now ready to be pasted into Excel.
Step 2: On your device, locate and start the Excel app. Then, from the menu, tap on the new tab and workbook. Point at the cells wherever you want and right-click to paste your data. The “Paste Options” is usually located to the right of the ‘Paste‘ button at the screen’s top left corner. If you see the downward arrow sign below it, click on it.
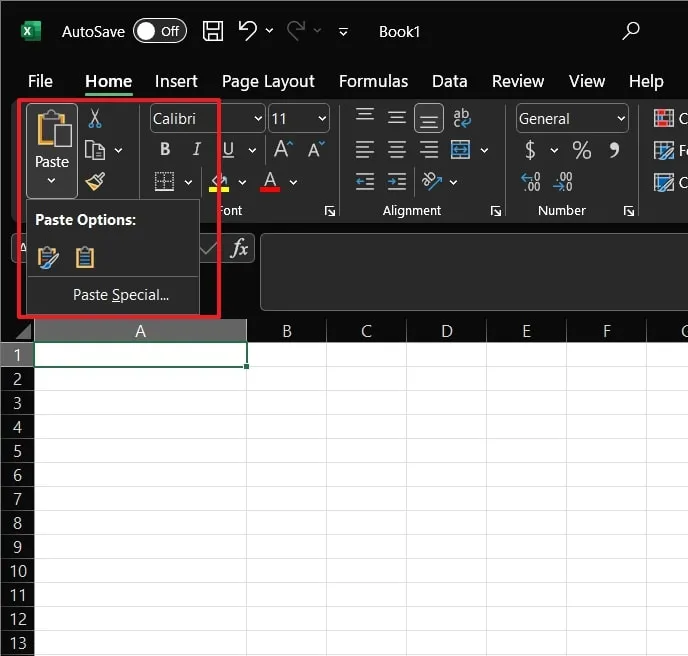
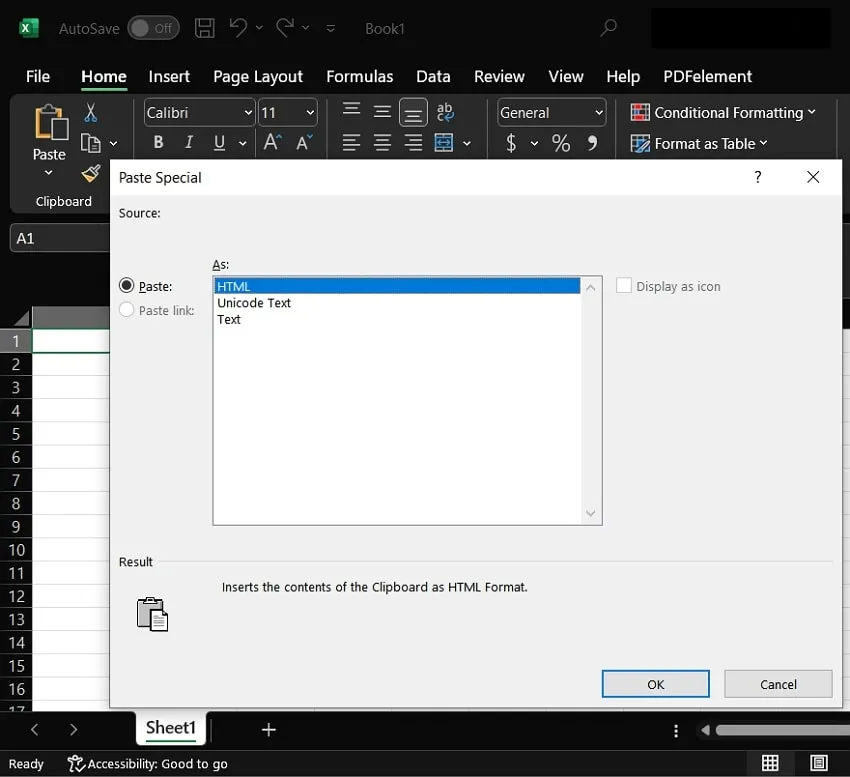
Step 3: Now you will get 2 preferred “Paste Options.” You can paste it as K for ‘Keep Source Formatting.’ If the application will create documents in folders that aren’t already present in the destination, then it is better to paste it as M for ‘Match Destination Folder.’ Also, you will get other paste options if you choose “Paste Special” as “HTML,” “Unicode Text,” or “Text.”
How to Convert a Google Sheets to Excel in Bulk?
If you are using Google Sheets to manage your workload, it also allows you to convert all the files into Excel. It will assist you in evading converting them individually, and this takes less time and is more efficient than the traditional methods of converting them individually, making your work professional. Follow the steps highlighted below:
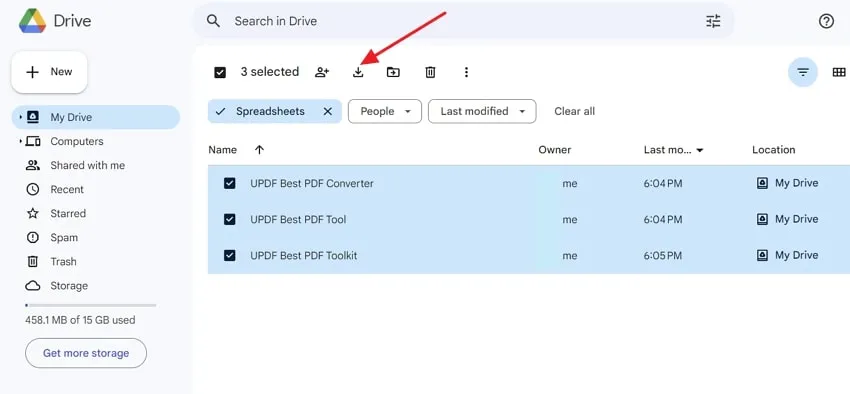
Step 1: To achieve this task, it is necessary to open Google Drive. Now, type the path where your files are saved, and then open this folder. This will work whether they are the personal files of a particular user or the files that are shared by various users.
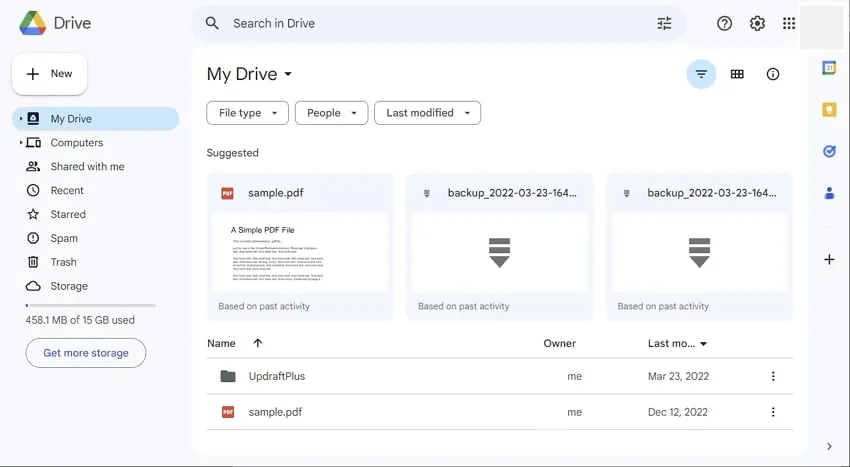
Step 2: On the site, you can check one box for every file, use your mouse to left-click on each file, use the Ctrl keys, and press each file. And both of these ways are represented as adequate.
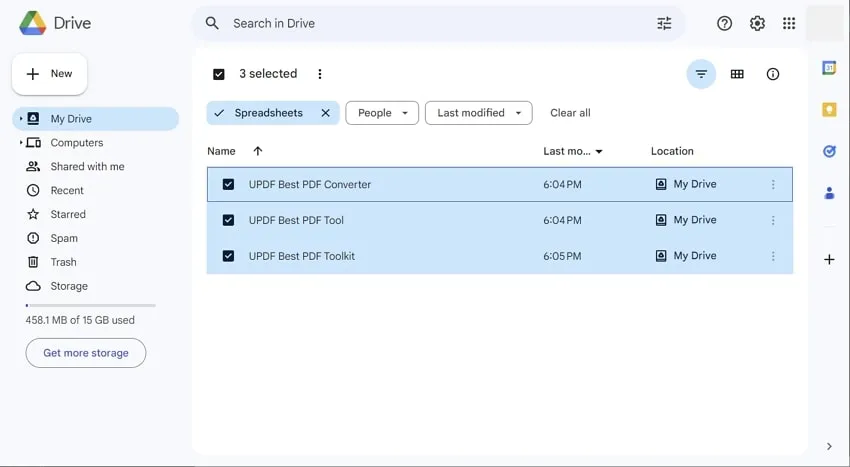
Step 3: Where the required files are chosen, click the “Download” button on the toolbar at the top of the page. It will download all the files you have selected for download. You will find all the files you downloaded in your device’s destined folder for downloads.
How do you export Google Sheets to Excel automatically?
The coordination of data management can be a crucial factor in managing workflow. A typical use case is to initiate an automatic Google Sheets to Excel. But if it can be done automatically, it spares you the necessary time and energy for those activities. Sheetgo is a unique no-code automation tool that enables users to transform data movement from one format of spreadsheets to another effortlessly.
Integrating it with Excel, you no longer need to export and update data manually: with Sheetgo, your Google Sheets and Excel become interconnected. Further, it guarantees that the data are synchronized and followed with the same updates on the sheet and go.
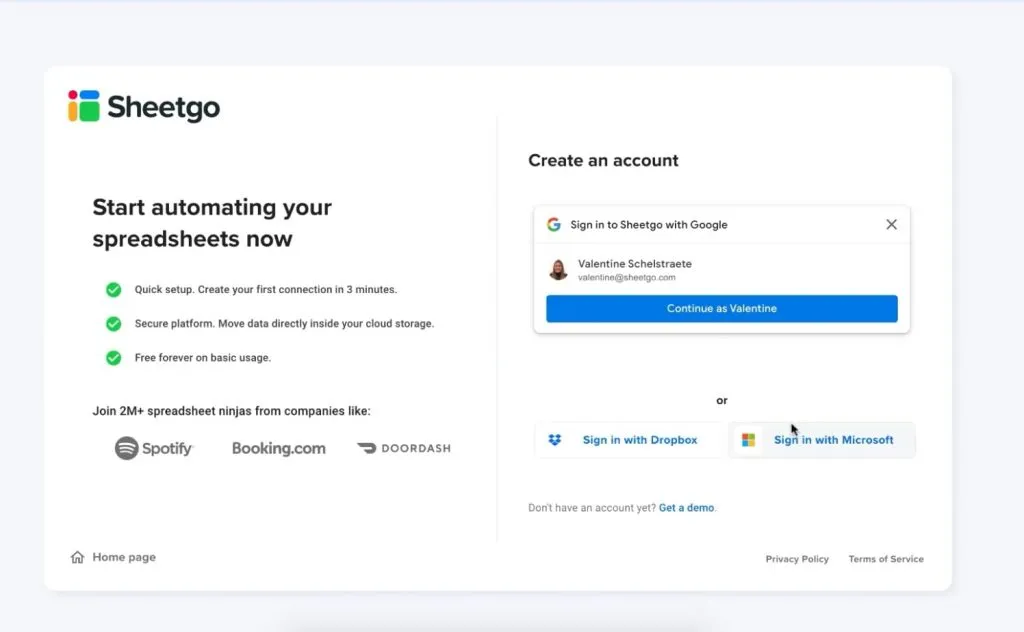
Step 1: Visit the Sheetgo official website and log in using your Microsoft, Google, or Dropbox account. Then, link files from any platforms in question and continue adding files to your Textbox as you did before. In this part, we shall map Google Sheets in Google Drive to Excel.
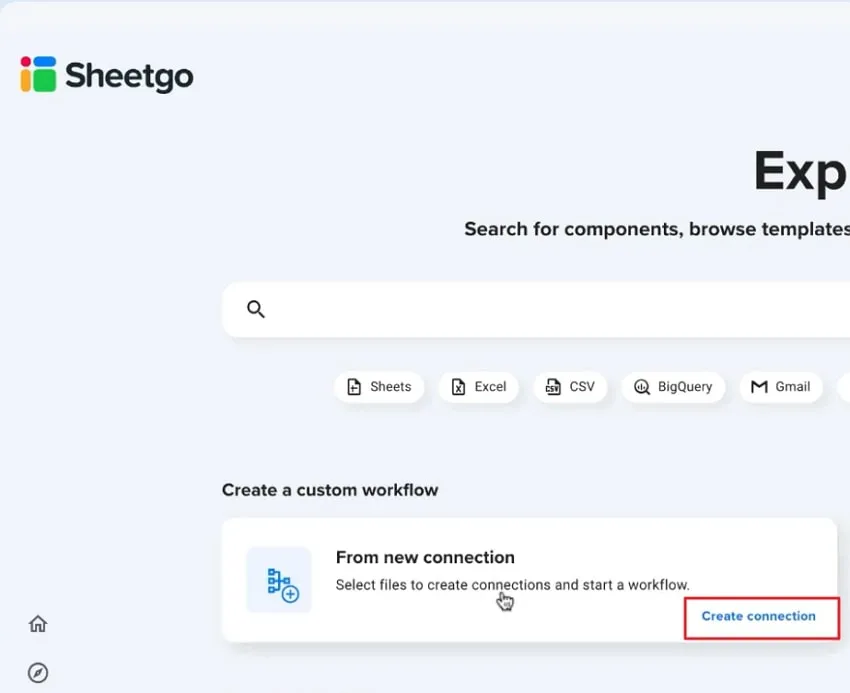
Step 2: Once logged in, click the New Workflow option and click “Create a Connection” for Google Sheets to Excel. Specify the workflow’s name and choose the Google Sheets file from which data will be exported. Also, check which source tab must be selected.
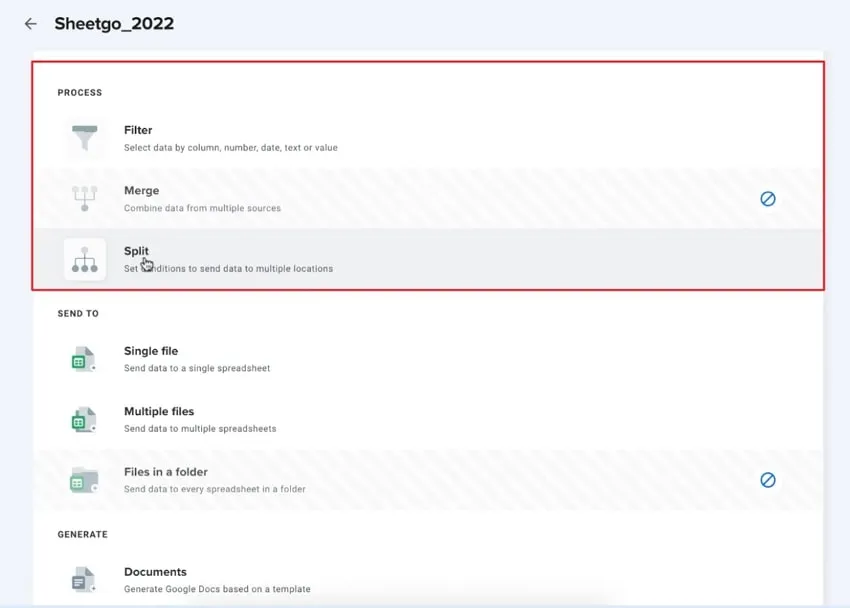
Step 3: After this, enter the source file and choose “Next Step” after scrolling down. Select the data process from the selection as it is available in either “Filter,” “Merge,” or “Split.” Also, if data are only copied without blending the information, select “Skip.”
Step 4: Don’t forget to select Excel as a file type for the exported data. In the next step, click “Finish and Save” to generate the connection.” It will be possible for Sheetgo to translate Google Sheets to Excel. This data will be copied into the new Excel tab from the source tab. Also, it is possible to monitor the flow, which allows controlling file connections.
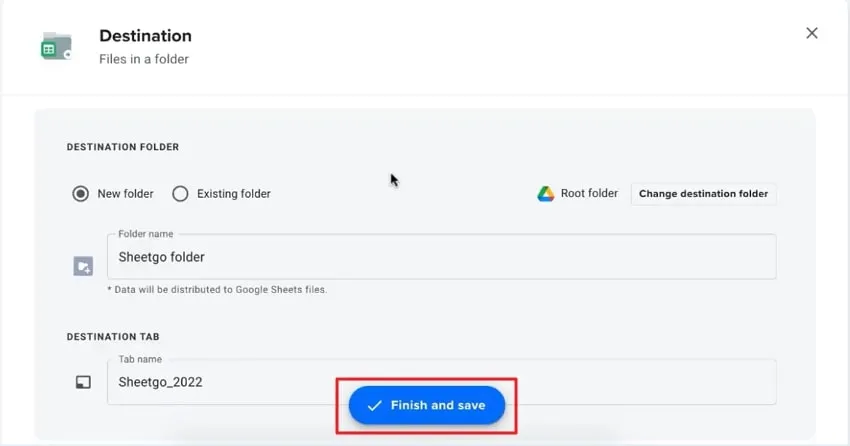
Step 5: Once more, open the created workflow on Sheetgo. After that, click on “Run” to update data in the destination Excel file. It will overwrite the file with the latest data from Google Sheets, which we just modified.

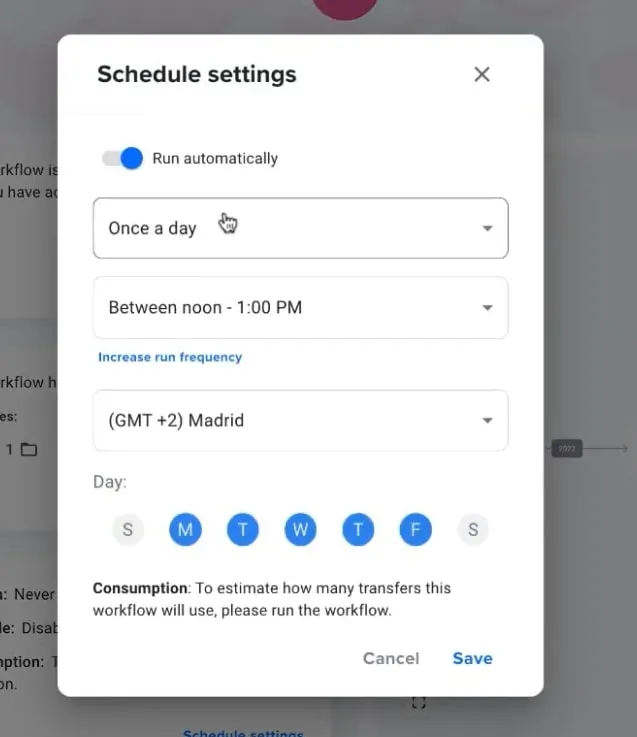
Step 6: Last of all, launch the “Workflow” in the Sheetgo and then enable the “Run automatically” checkbox in the settings of the “Schedule Settings.” There is also an option where sheetgo can update the frequency and time to make the flow run automatically.
