Stamps are usually in the document to indicate the file’s source and origin. Especially when sharing a protocol with someone or some legal document, if you want to make a copy of a document but do not need the watermark, you may wish to find out how to delete the one in Word.
This is how we can do that here are 2 different methods with the instructions below. We shall also indicate some of the reasons why removing the watermark is hard. However, we will also tell you how to remove watermarks from PDF files if you are dealing with a PDF file.
How do I remove the background watermark in Word?
You could have an article that you downloaded or a file someone shared that has that watermark. However, you would like to employ it on your own, but the watermark hinders you from doing that. It cannot be directly clicked and deleted as it is often safe in the background and not easy to delete.
However, fear not because we will guide you on removing it right from its source in this guide. Still, here is how to remove that watermark from the background. Stop now and learn how to remove the watermark from the background.
Step-1. Launch the Word file and also navigate towards the hamburger option and press on ‘Design’. This will open a banner of tools on the top.
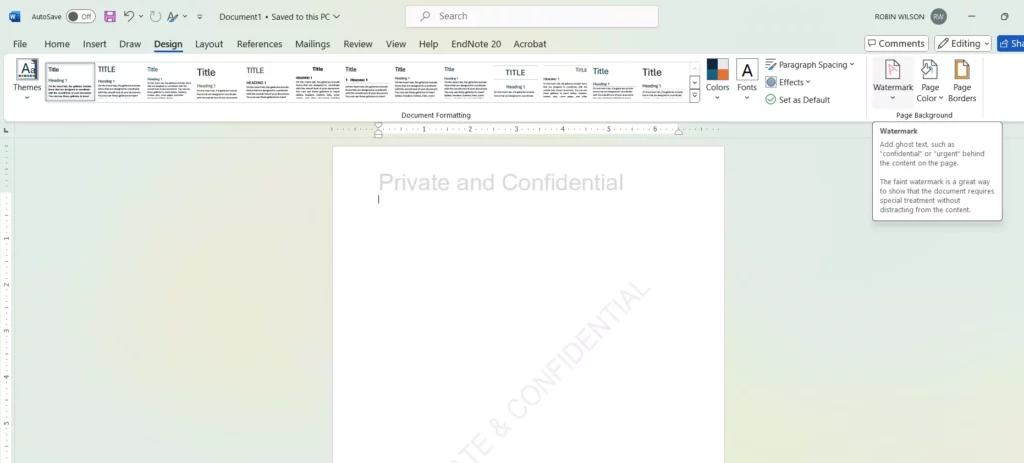
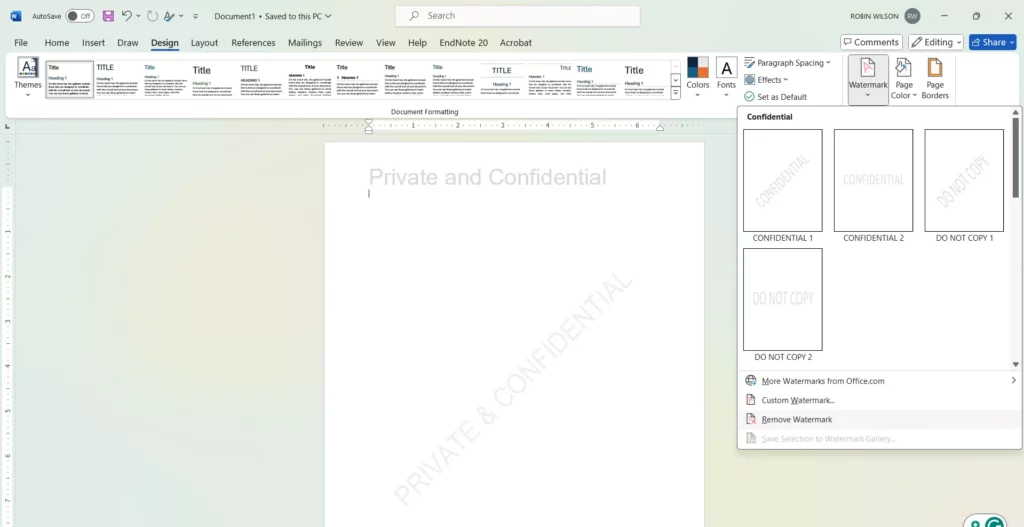
Step-2. On the right side of the tools banner, you will find the Watermark option; click on the icon to expand the menu. After that, you click again to choose “Remove watermark.” Doing so will remove the watermark.
Step-3. To save the changes, press “Ctrl+S” or on the toolbar, there is the “Save” button in the upper left corner.
This one slightly differs from the general watermark usually embedded in the background. See the following guide to help you delete the watermark from the header and footer in Word.
Step-1. From within the Word document, you need to go to the ‘Insert’ tab, which will open up a banner of options.
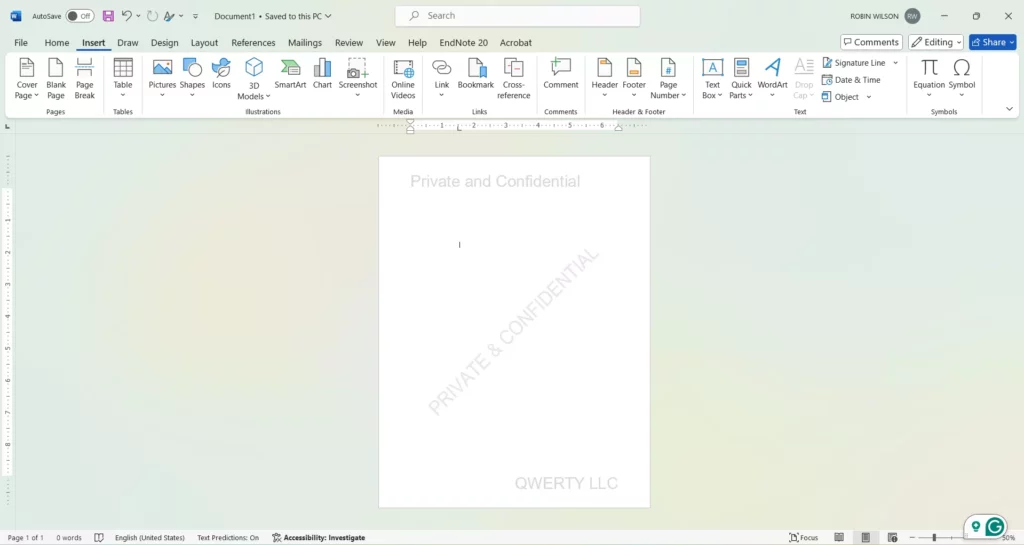
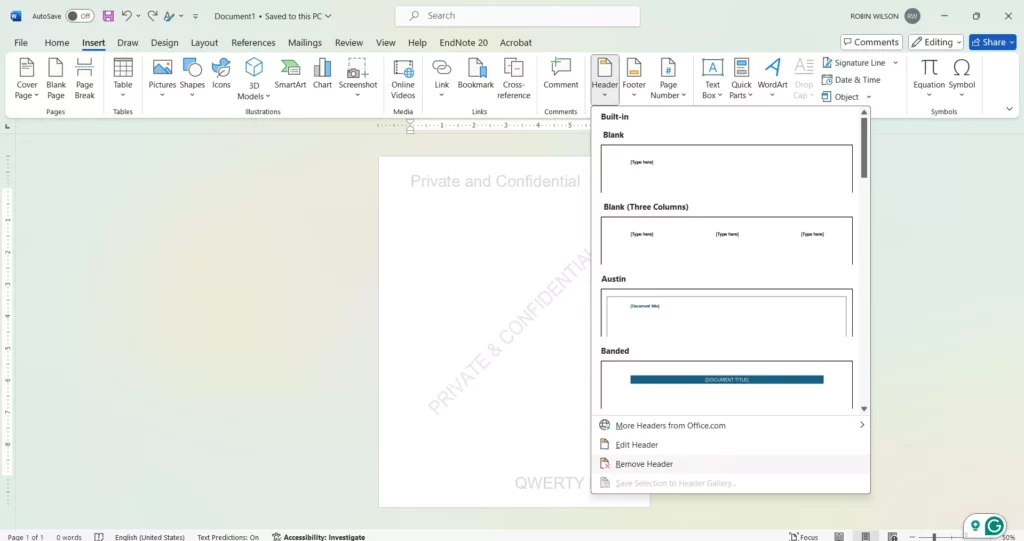
Step-2. From the panel at the top, click on the word “Header,” and a menu will appear. Under the “Header” selection, click the “Remove Header” button. This will remove the header.
Step-3. This can be done by clicking “Footer” from the tools banner in the “Insert” tab. After that, the user clicks on the “Remove Footer” button, which in turn leads to the removal of the footer.
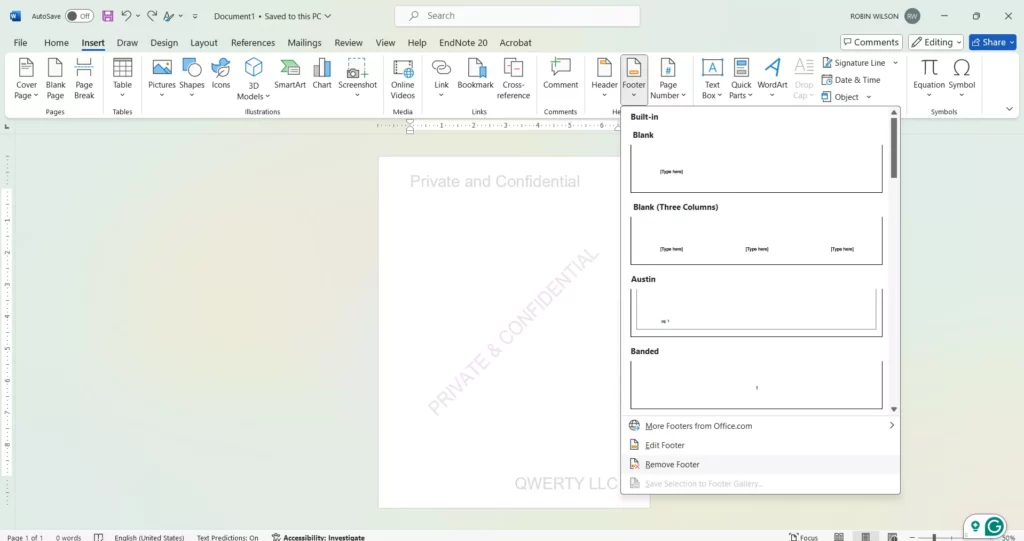
Instead, right-click the mouse or double-click in the header or footer field. It is usually positioned above and below the page margin. It means that the headers and footers will become changeable, too. You can remove the watermark text or change an image directly from here.
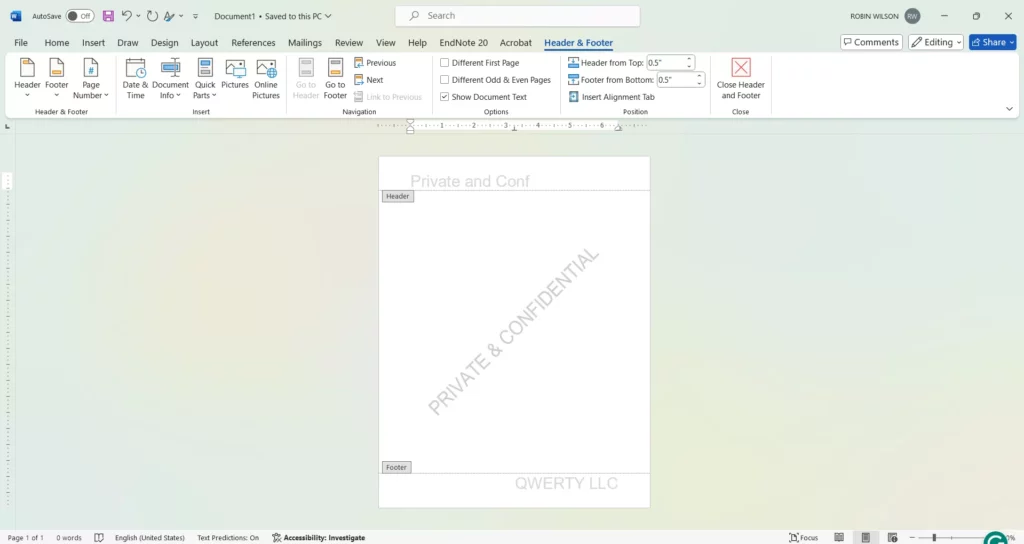
Step-4. When completed, to delete the watermark, go to the ‘Insert’ menu and click on ‘Header & Footer.’ After doing so, click the ‘Save’ icon on the top left part of the window.
Why Can’t I Remove Watermark in Word?
In the following part, I am going to discuss the multiple causes that hinder you from erasing the watermark in Word. The most common reasons are:
- Extra special effort has been made to ensure that the original file is not altered in any way.
- Watermark can be in a different part of the file
- It should not be inserted using the insert watermark option but as an object.
- The document is prepared in another software, which does not allow editing as easily as Word.
- The possibility of the document being corrupted is rather slim.
Fix 1. Remove the Watermark in Word with the Selection Panel
But if you can’t delete the watermark by employing any methods disclosed in this section, there is a way to bypass the watermark.
Step-1. Locate the Word document and click on the “Layout” tab at the top tab of the Word panel.
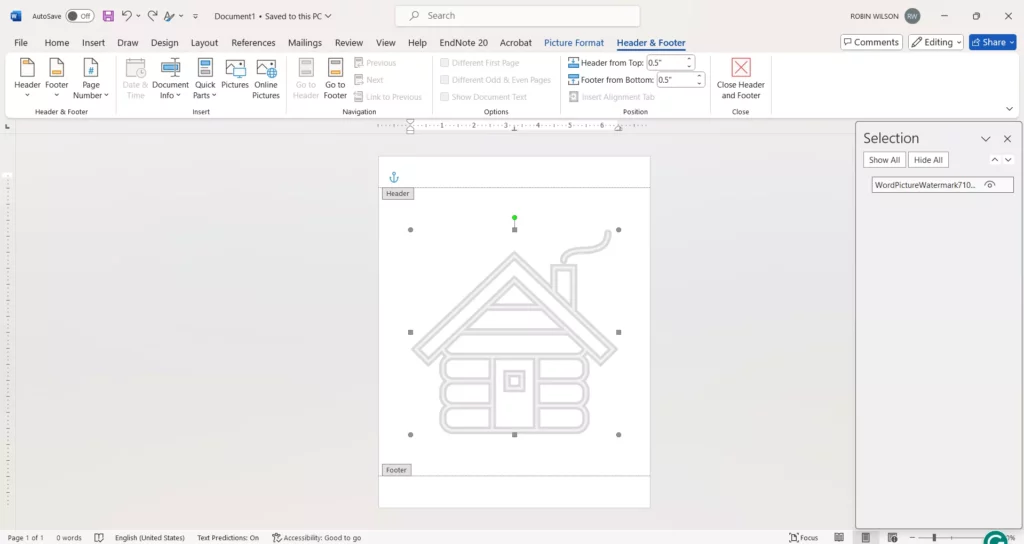
Step-2. From the set of tools on the side, click on the button labeled “Selection Pane.” On its right side, a selection pane will be displayed on the screen when you use the Windows version.
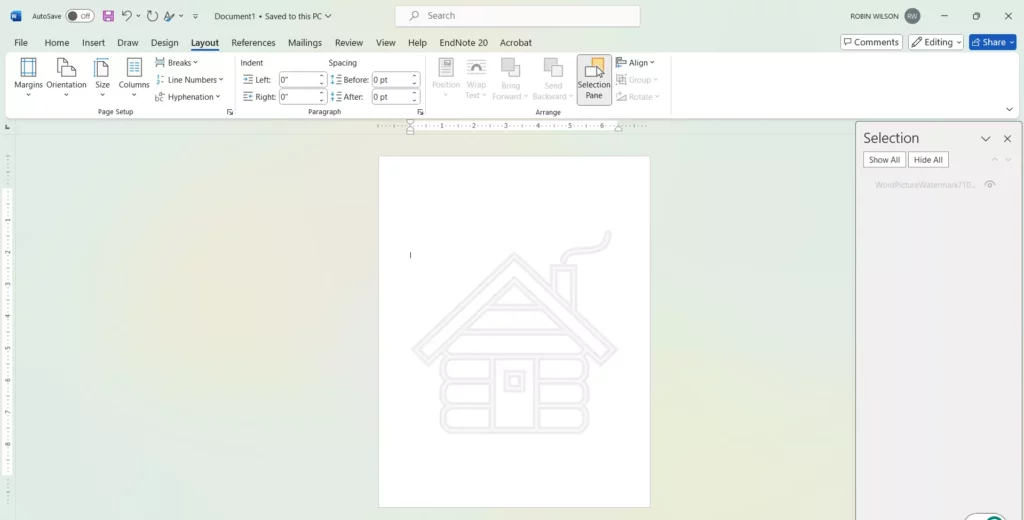
Step-3. Right-click on the page to position the cursor below or above the margins of the page. This will allow you to see the object list there on the selection pane.
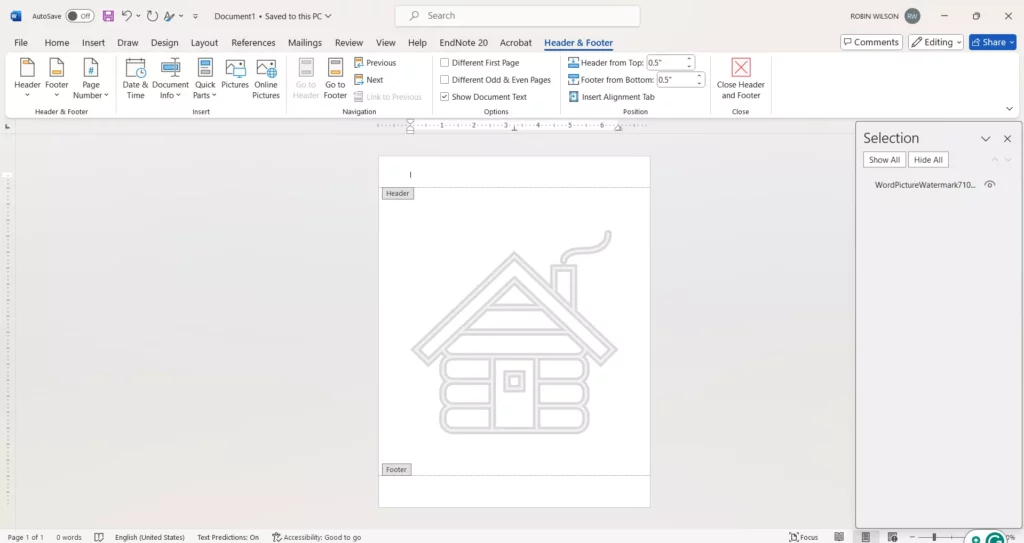
Step-4. To select the watermark on the actual page, double-click the desired text or image watermark, or you can select the watermark directly on the selection window pane. To delete the watermark, click the “Delete” key on the keyboard.” If the changes have been made, they need to be saved, to do this use the button “Save” or “Ctrl+S” on the keyboard.
Fix 2. Remove the Watermark in Word with Select-Object
If any of the above ways have not solved your problem, use the below one, which should aid in eradicating the watermark. That is quite simple; all you have to do is follow the instructions, and then the watermark disappears.
Step-1. Open the Word file. From Home tools select Editing and click on it to open a menu, then select Select.
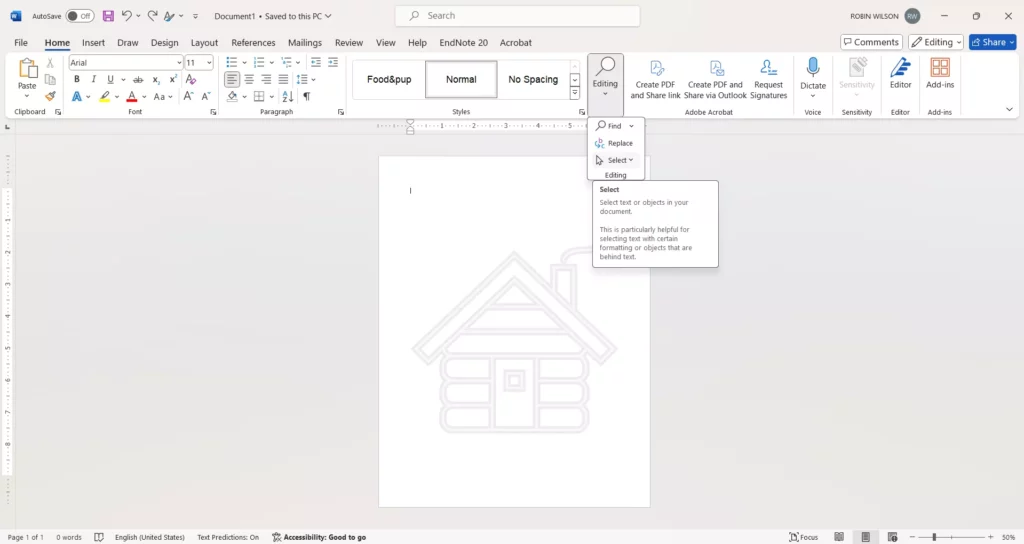
Step-2. Click with the cursor on the area of the page on top of the margins twice. This will broaden the viewing of the header and footer area and enable choosing the watermark by merely clicking on it. After that, type the ‘Delete’ or ‘Backspace’ key to delete the watermark from its area.
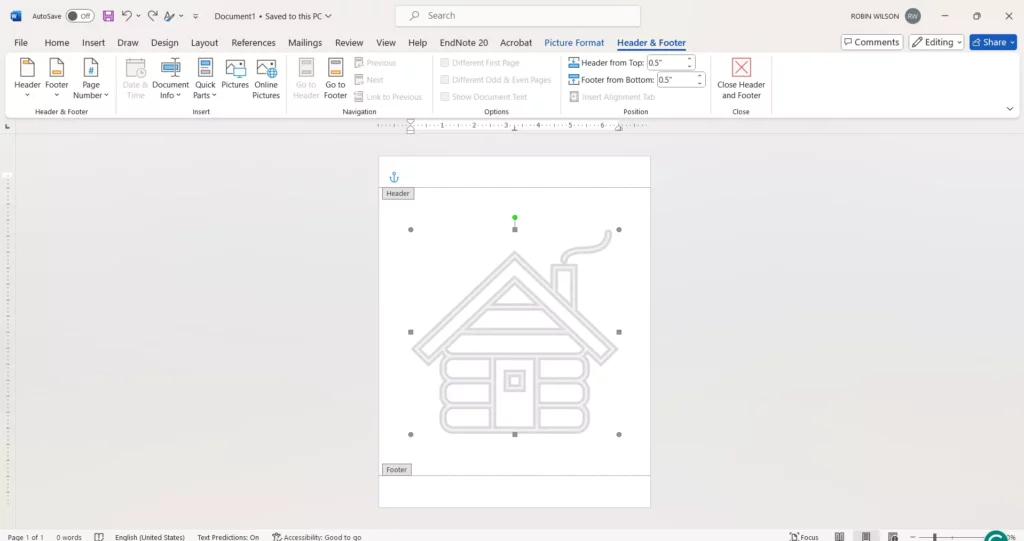
Step-3. They should then close the file and save it by pressing the ‘Ctrl S’ buttons or clicking the ‘Save’ button.


